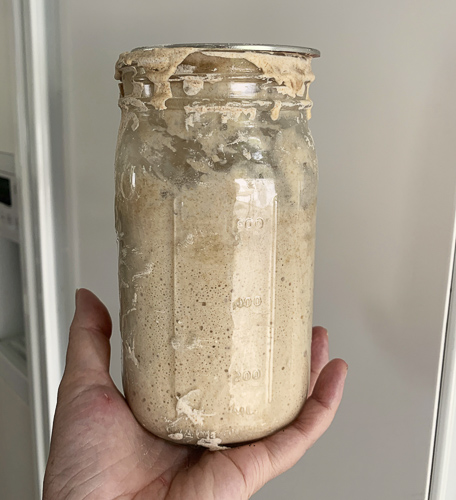
Like so many people, I have taken advantage of this time homebound to work on a much desired project. Making Sourdough Bread. In all honesty I feel a little gypped. I have been dying to get down to this for the longest time, so I feels like I am joining all the other flour-heads just because. Ach, whatever- here we are- and it all begins with the Sourdough Starter.
As many of you know I had a long career as a cake baker, which I can do blindfolded. I have never been trained in bread baking, though I have done quite a bit in my day. My post on No Knead Bread is one of my most popular posts (7 years later!). I have also created some great breads, even making a poolish to get some amazing flavor. There have been crackers, pitas, matzohs, and pizza doughs. However, sourdough has always eluded me, until now. Largely this is because I have begun a couple of starters over the years that were complete failures. It was rather upsetting, but rather than getting dismayed, I just figured it wasn’t my time.
So here we are. I am going to walk you through my experience of all this and try and share some insights and pitfalls that might help you. As I said, I am not an expert, just a crazy driven experimenter that likes to share. Those of you with any additional wisdom to share, please do so! I mean come on, we are all weirdly connected by this beast, the wild yeast, so let’s do this together.
Researching Starters
As I set upon this journey- I dove into a bit of research on how to make a starter. I looked at professional bakers books, flour producer’s websites, the website of my pizza oven (Gozney) and my fellow bloggers. The results were remarkable not all the same. The professionals got super science-y with temperatures, hydration levels, flour types and methods of feeding. The other end of the scale were the bloggers, who made it all seem so simple and cavalier.
My approach was to study the science. I wanted to understand the nature of this beast, and then put it into practical terms. I will say that I am happy that I did this. It helped me wrap my brain around the process when things seemed to not go well, and it also helped me to respect and nourish the yeast. Like so many things in life and with growing things, like plants and children, it’s simplistically complicated.
The Method
Below I will list a 7 day plan to build your starter. Honestly, I recommend longer, such as 10-14 days, but after 7 try and loaf and see how it goes.
You will need the following items:
- Digital scale that you can tare and measure in grams
- All purpose unbleached flour
- Organic dark rye flour
- Filtered water
- 2 quart size glass containers- plastic is ok if that’s all you have
- A chopstick or wooden spoon handle
- A rubber band, tape or marker (on glass) to mark side of container
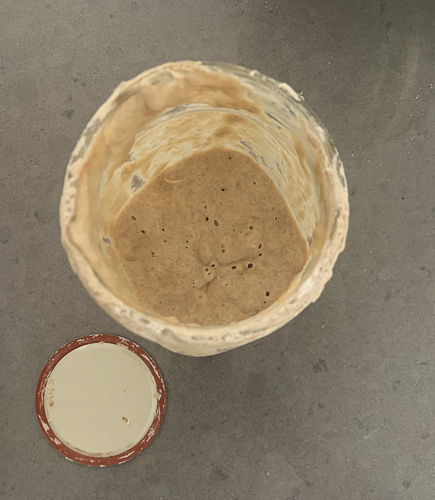
Day 1: In a clean jar, place 100 grams of rye flour and 125 grams of filtered water. Vigorously stir with your chopstick to aerate and scrape down the sides as best possible. Place a lid on top but do not cinch closed. I personally use a mason jar and place the flat lid without the ring on top and just let it sit there.
Wrap the rubber band around the container and place at the level of the starter. This is to help you assess the rise of the starter. Set aside on a cutting board or kitchen towel and try to place in a warmish place. 72+ degrees. for 24 hours. If your kitchen is cold put it in your oven with the light on. Do not leave directly on a stone counter, it’s too chilly. You can place it on a towel, or in my case, a junk mail letter that I had kicking around.
Day 2: Place the clean jar on the scale and tare to 0. Stir the starter and pour in 70 grams into the new jar. Discard (or save- more on that in an upcoming post) the remainder. On top of the starter add 50grams rye and 50 grams All Purpose flour and 100 grams room temp water. Vigorously stir again, scrape down and set aside for 24 hours.
Day 3-7: Repeat Day 2. If you like, you can feed the starter every 12 hours for a few days to move things along. It’s up to you.
What should be happening
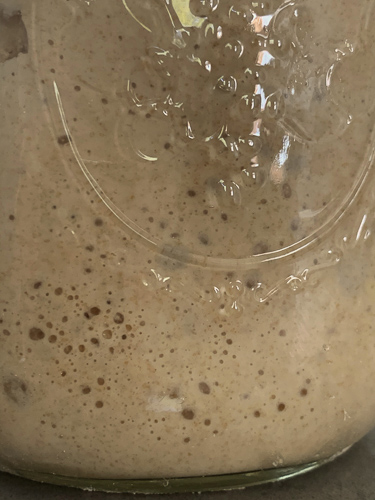
What you are creating with this concoction is the perfect environment for yeast to eat and grow. When you feed the starter with water and flour it provides the necessary feast for the yeast. What it gives off is CO2, which creates the bubbles, and it also creates a little lactic acid, which is your sourness.
Sometimes on the first day, sometimes later, you will notice that the starter will expand and create little bubbles on top, similar to the ones when making pancakes. As time goes on the bubbles will be greater and larger. I have heard of folks getting a slow down around day 4 after a robust start. I would make sure that you are using unbleached organic flours and try bottled spring water. Also make sure you are not getting any contamination from rogue bacteria.
After a few days you will notice that there is a rhythm to your new pet. It will chill after you first feed it, then it will bubble and expand, and then at some point it will have exhausted all there is to eat. At that point it will start to collapse and sink back, but likely not all the way. If you take a spoon and dig into it you will find a web of stringy glutenous threads. That’s what you want.
You should notice a sour smell after a few days. It should smell tangy but pleasant. If it smells like wet cardboard or off putting, discard the whole she-bang and start over. I like to taste my starter. I know it sounds weird, but it should be super tart and tangy, like a kickin’ yogurt.
It’s not really all that easy to “kill” your starter. If it looks like it is just not taking off, try feeding it with only rye flour and water and see if that helps. Another thing would be to make sure you are keeping it in a warm place, but not too warm. I started mine in the cooler days of the spring, so I turned on my oven light and nestled the starter in there. It was very happy there.
A few things I learned
I was under the misunderstanding that the yeasts came from the air, which they do, but not entirely. I have studied wines and spirits, and there is a method of wine and beer making that relies on the natural yeast floating in the air, I thought starter was the same. The fermentation process between just flour and water also interacts with the flour. This is important, since bleached flour will not make a good starter. I used half and half of a robust unbleached all purpose flour and some organic rye. The rye is a great pal to a starter and it’s worth tracking some down if you can. It is possible to make a starter without, but try and use the highest quality flour you can get your hands on. Preferably organic, it’s worth it.
The next thing is the water. I read about how filtered, or unchlorinated water is super important. I have mixed feelings about this. At first I used filtered water from my fridge and let it warm to room temperature. This is also supposed to allow any chlorine to “burn off”. When I finally got my starter going I divided it and did some test experiments with it. Turns out that water straight from my tap was just fine. My suggestion: to insure good results go the distance and do it up right. No need to make things harder on yourself in the beginning. With time you can learn your parameters.
I was able to get my starter to pass the “float test” after about 5 days. For those who don’t know, the float test is a method of testing to see if the starter is active enough. To do this you take a small spoonful of starter after it has been fed and risen, and plop it into a glass of water. If it floats you are good to go. My personal experience has taught me that even though it was good at 5 days, it got better as it got older. I would say a good 10-14 days of regular feeding and you end up with a robust starter with great flavor.
A word about sourness. The sourness is a product of the fermentation process. As the yeast eats and grows it gives off gas, which makes the bubbles, and some lactic acid. It’s the acid that is the sourness. I happen to love a super sour loaf. To achieve this you can do one of two things. One is to proof your starter in a very warm place. It will grow quickly, and give up a lot of acid. I did this for a couple of days to build up my base sourness. Now I periodically will do that to keep my starter tangy. Another method is time. I saved a bunch of my starter and popped it into the refrigerator and left it there. After a few days I fed it some and put it straight back into the fridge. After a couple of weeks it has a groovy tang to it. To use it I just take some out, feed it like normal and prove it at room temp overnight, maybe for a day or two if it’s not responding well, and go on from there.
Another thing is about putting it all on pause. I would recommend regular feedings for the first two weeks. Once you have a well colonized starter you can tuck that baby into the fridge until you need it. Simply give it a good day before you plan to start the dough to refresh and grow back some umph. I have heard of people keeping a paltry few tablespoons of starter in the back of the fridge, and feed it once every week or two. I happen to be a ninny, and kept two at first on the counter and one in the fridge. Mind you it did allow me to experiment, but the truth is it also meant that I had an extra just in case I did ruin it. (never happened).
I have heard it said that starters should not be raised in a plastic container. I can say that in my experience I found it not to be an issue. You can also see from my lead photo that after a few weeks I got a little lazy about scrubbing my jar every day. Not only was this not a problem, but I kindof got into a rustic French kitchen vibe about it. I now wash the jar about every 10 days or so.
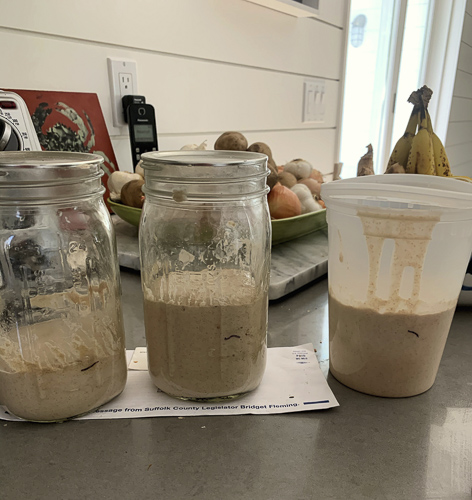
Another alternative, though I will admit that I have not tried it- is to let your healthy starter dry out, and then store it that way. The process is to spread your starter out, like icing, onto a sheet pan covered with a silpat or parchment paper, and let it turn into a crusty dried out paste thing. Then break it into bits and store it in a tub in the fridge. This makes sense to me since it’s basically homemade dry yeast that we buy at the market- only better.
All that discard
Lastly, there is a fair amount of discard starter that you either can collect or toss (NOT down the drain, thank you). The discard is excellent to share with pals, but it is also great to use in other baked goods such as crackers, pizza dough, waffles, etc. The third post in this series will be on the discard- and I have some super yummy recipes for that. So stay tuned!
The last word
As with most new living things, my first days and attempts were fraught with doubt and over attentiveness. Try to relax and trust the process. It’s just two ingredients + time. Your starter will start to become a sort of a kitchen side kick. You will be able to learn it’s needs and quirks, but know that it’s pretty resilient, so don’t sweat it. Feel free to name your pet. I haven’t since I feel like it’s an extension of myself, and I would no more name my hand or leg- but you can do you.
Know that this is also the tip of the sour iceberg. There are different styles of starters that utilize different flours, hydration ratios, and sourness levels. It’s a deep and wide world that you can fully become engulfed in, but for now, start here.
Next comes….. The bread!


 Gail says
May 28, 2020 at 4:15 pmSO EFFING GOOD! You hit all the highlights of this cockamamie process that we all jumped on now, since we have time on our hands.
My starter was not doing that well because it was cold in our house. Despite the fact that I had the starter on a towel, I still kept it on a stone countertop. Not good. Once I moved it to wood, it was much happier.
In addition, to really ensure a successful starter from the get go, you can add a couple of grapes or raisins to the starter. There’s yeast on that fruit and the starter loves it. One 12 hour period is all you need, or, as the case was, all I needed.
 Gail Watson says
June 1, 2020 at 1:39 pmThank you Gail- Ah yes! The raisins or grapes! A great solution. You might try the oven with light on trick. I didn’t think it would be all that, but it worked like a charm. Stay tuned for my bread making post up next! xo
 Michelle Yang says
June 9, 2020 at 3:45 pmPerfect timing! Im glad the whole world is making sourdough starters including you 🙂 I’ve been making your no knead new york style bread pretty much every week and I came to visit your blog again in the hope of finding tips on how to make the no knead bread with sourdough starter. I starter mine 5 days ago and I was hoping to combine the sourdough starter to the super easy no knead bread (Im planning to make a sourdough bread tomorrow but dont think I’ll be making that every week. It looks like so much work! If you haven’t included this in the upcoming post already, please would you consider adding it? 🙂
 Gail Watson says
July 7, 2020 at 12:16 pmugh, it is taking me a long time to get this post together. I have really been researching this one and working on putting together a comprehensive version that is fool proof. The process is not complicated, but it is nuanced. But then, sometimes the best things are worth the effort!