dessert
As a rule I am not much of a cookie fan. Not really sure why that is, it’s not like I have anything against them, just less my thing. When I was in High School I had an Art teacher named Anne DeReeder who really loved them. I spent a lot of time in the art room back then. Aside from the science lab (I was President of the Outing Club if you could believe it), it was where I gravitated to. It was a room of creation, of possibilities and the coolest people in the building.
Anne was full of energy and brightness. She was more laugh and hugs than teacher and authoritarian. She was about fun and possibility, and really delighted in us kids and what we were doing. I mean, she flew her own Cessna- She was pretty cool.
I recall a conversation one late afternoon that we had where she got all goosey about cookies. They were little jewels to her- a simple formula that could be done so wrong and be so bad- but when made right, got her excited. I would have made cookies for her, I was a baker even as a small kid, but just never quite got onto the cookie bandwagon.
But I do like to make meringues.
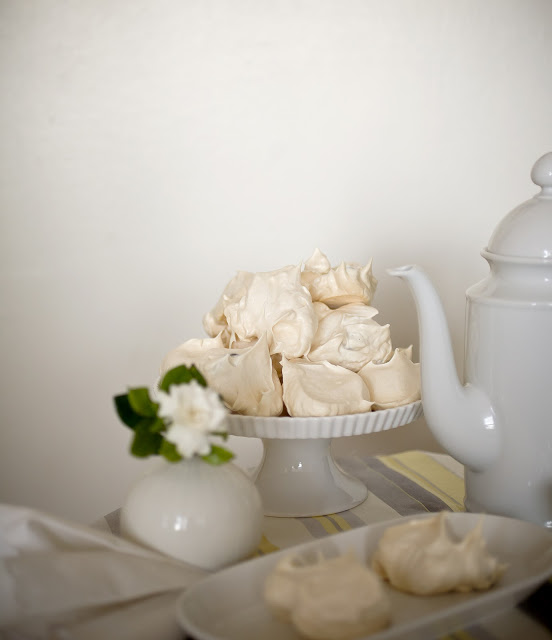
They’re so simple and just a little magical to me. This batch I did half plain and half with some chocolate folded in. I like them both ways. I like the grainy crunch and the melt away on the tongue. They can also hold for a bit. They’re easy to make and just keep on hand for awhile.
I’ve been known to pipe my meringues into pretty shapes- one day I’ll do some for you- but I kinda like the geode style. I find them beautiful and unique and soft and romantic. I’ve been known to make them monster big for laughs, or bitsy ones when I’m thinking I should be sugar mindful.
Golden Meringues
made 30 of medium large cookies
4 egg whites, room temperature
.5t white vinegar
2/3 c granulated sugar
4t cornstarch
The cleanest bowl and beater on the planet- I mean it
preheat oven to 250˚ and line cookie sheet with parchment paper
in your super clean mixing bowl (do not use a plastic bowl, only glass or metal)
place the eggs and the vinegar.
Beat on medium high until foamy and starts to thicken.
Tablespoonfuls at a time sprinkle in the sugar. When all incorporated turn beaters on to high until whites are stiff and glossy.
They should be tight with soft peaks when you pull the beater, but not grainy and not floppy.
gently stir in the cornstarch.
using a large spoon mound meringue onto the cookie sheets.
If you like chocolate in yours, just toss in a handful of chopped chocolate and fold in at the end.
Bake for 90 mins and then reduce the heat to 200˚ and back another 90 mins
store meringues in an airtight container and keep on the counter or cupboard.
Peppermint Marshmallows: That Look As Pretty As They Taste
I surprise most people when I tell them that I love the snow. It’s true. I don’t mind the cold, and I think snow is amazing. I love how it changes the landscape of the things I see everyday into something so beautiful and different. I even sort of love shoveling it- it’s true! Being out in the hush chill, getting all warm and toasty while making neat pathways… I also love to ski, but that’s something different.
But one of the best parts of being out in the snow, either playing in it or just moving about- is coming in for hot chocolate. I am known for being a chocolate fan, but warm milky chocolate sipped with red cheeks is my kind of afternoon.
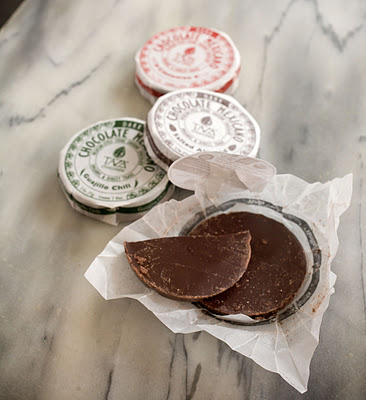
As you know, there is hot chocolate and there is hot cocoa. Essentially interchangeable, though different in preparation. Dark chocolate of any kind can be melted and stirred into heated milk and then sweetened to taste. This is my preferred style. Good quality chocolate has as many nuances of flavors as a glass of wine. Though I don’t boast knowledge of different chocolates- I can certainly tell the good from the… eh. When it comes to chocolate-I don’t do “eh”. Aside from this it was the way that the Mayans made Xocolatl, and I like that idea.
Roasted cocoa beans when ground eventually give up their oils and liqueur and turn into dark beautiful chocolate. I can see hands working the stone, placing some of the rich brown yumminess in a stoneware cup, adding hot milk and creating a drink. Gotta love that romance.
But Hot Cocoa is just as tasty- again- good quality cocoa is a must. No dusty dried out packets out of a box- make your own- get the good stuff, it doesn’t use much and turn a brown drink into a heavenly treat. THAT’s the way it was intended to be enjoyed, not as a glass of chocolate milk warmed.
Now- to that- marshmallows. I’ve been making my own marshmallows for a long long time now. They used to be a big thrill, but these days, everyone is getting in the game. Bravo!
For my beauties I took them just a little step further. First off I added a middling dose of peppermint. It’s a wonderful pairing as they melt into the chocolate. The second is I’m just not a fan of the cube. They’re ok, and I’m not opposed to the iconic shape, I just like to make pretty where I can.
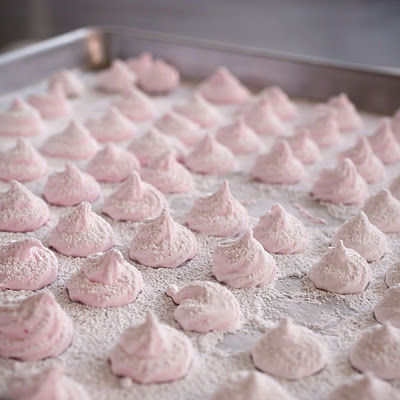
I opted for two different shapes. The first is a rosette in three different shades of pale pink. Just SO pretty against the dark brown chocolate, and so lady like and sweet to behold. Using a star tip I simply piped them out of a pastry bag onto the tray into rosettes.
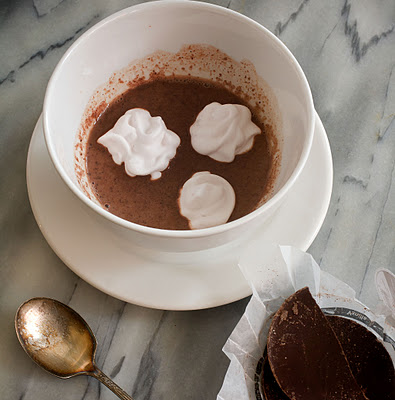 |
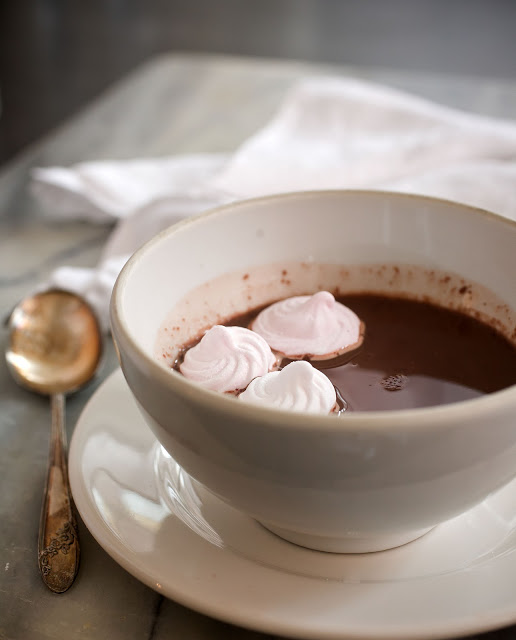
| Hot Chocolate with Marshmallow Clouds |
The second shape is more like a cloud. Puffy folds of marshmallow float softly in the cup. So much nicer than a dusty cube, don’t you think? For these I used a Rose Tip icing tip and made random folds and mounds to my liking. Super simple and fun to make.
Homemade Marshmallows
makes tons depending on the size, enough for any crowd and more
3T unflavored gelatin
.5c cold water
12oz sugar
1c clear corn syrup
.5 c water
.25t peppermint oil or 1t peppermint extract
2c powdered sugar
red paste food coloring (optional)
In mixing bowl combine water and gelatin and let stand. Attach whisk.
In heavy saucepan combine sugar, syrup and water. Boil on high heat until the syrup reaches 240˚ on a candy thermometer or soft ball stage
With the mixer on medium low, slowly and carefully pour syrup over gelatin.
Continue to beat until cool, approximately 5-7 minutes.
Before it gets too stiff or cool, add the extract and carefully dab some food coloring into the marshmallow. A little goes a long way so start with the teeniest bit.
The consistency of the marshmallow needs to be stiff enough to maintain it’s shape when piped, but not too stiff for it to become stringing and tight.
The consistency of the marshmallow needs to be stiff enough to maintain it’s shape when piped, but not too stiff for it to become stringing and tight.
To pipe rosettes: Using a pastry bag or large plastic freezer bag, fit with a #8 star tip.
Prepare several sheet pans with parchment paper sprayed with cooking spray. Alternatively you can line trays with plastic wrap and spray as well.
Fold down sides of bag halfway and fill the cone. Pulling the sides up, twist it closed.
While pinching the twisted part between thumb and first finger, squeeze the bag with the rest of your hand. Use your other hand to guide the end of the pasty bag. Sort of keep a finger on it so it doesn’t go rogue on you.
Make the swirls by starting on the outside and form a concentric circle in while applying even pressure on the bag. When finished stop squeezing and quickly lift the bag to break off the rosette.
This takes a little practice, so have fun and play around a bit at first. Learn the latitudes of more pressure vs speed etc.
To get the different colorations I started out with the palest pink. When I exhausted the marshmallow in the bag, I tinted the rest of the batch a little deeper and then repeated this again with the final piping round.
Once the marshmallows are piped sift some powdered sugar over them to cover completely and allow them to dry overnight.
Once dry remove from the paper and dust the bottoms to prevent them from being sticky.
Store in an airtight container or in cello bags.
To pipe clouds: Use the same technique as above to prepare your pastry bag, this time fitting it with a #104 Rose tip.
Make the clouds by randomly piping folds and ripples by placing the wider end of the tip towards the paper. This will create a thicker base and a frillier, fluffier upper edge.
Make them as random and pouffy as you like.
Dust them thoroughly as above and allow to dry overnight. Remove from the paper and dredge the bottoms in powdered sugar.
Store in airtight container or cello bags.
Hot Cocoa Recipe
makes 4c of rich delicious cocoa
.33c Valrhona Cocoa Powder
.75c white sugar
pinch of salt
.33c boiling water
3.5c milk
.5c cream
In a saucepan combine cocoa, sugar and salt and stir to combine.
Whisk in boiling water and stir smooth
Add milk and cream and slowly and carefully warm to desired temperature. Take care not to boil or scorch.


